Sunday, March 14, 2021

Flammkuchen Freitag!


Yet another project is complete!  This one started out, with all good intentions, to build a mech based on a design from modeler/manga artist/anime creator Makoto Kobayashi.  Long time visitors to this site know of my admiration for this individual.  Check out his other work; there's lots of it out there!

One of his more bizarre designs is a mech first created for Z Gundam, the Baund Doc.  Not your regular anthropomorphic style, this one is almost bird-like with spindly arms all atop a saucer.  There are many variations, and the style evolved into another mech for his "Dragon's Heaven" OVA called a Gampf.


I have wanted to build one for quite some time; there were many false starts and delays over the years.  After the snow globe diversion, I resurrected the concept.  I just had to find the right parts.  Luckily I had in my possession a previously enjoyed Slave 1 model (thanks Joe!), which would make a suitable saucer.  The rest of the parts would be liberated mainly from two other Bandai Gundam kits, a Jamru-Fin (from ZZ Gundam), and a Hygogg (from War in the Pocket).  But I could not bring myself to pick and choose the parts, so instead I scavenged what I needed from the greeblies box; tank parts and other models from way back.  Copious amounts of dollar store bits also made it into the mix.  


So in this jumble of bits and pieces are acrylic shapes, and parts from several kits, mostly some old Dorvack suits and early Gundam models.  So no new models were harmed in this venture!  There are also toy parts and (very weathered) ping pong balls.  Those were used under the saucer.


I kept the underside detail to a minimum as it would only be seen from the sides.  An acrylic scoop was used to house all the upper parts.  (I was surprised to see that other modelers making variations of this mech also used the Slave 1 saucer as their base...)


One final test assembly.  The left forearm (with the claw) is actually a handle for a mini driver, and of course there is the customary Zaini egg. And now it's Prime Time!


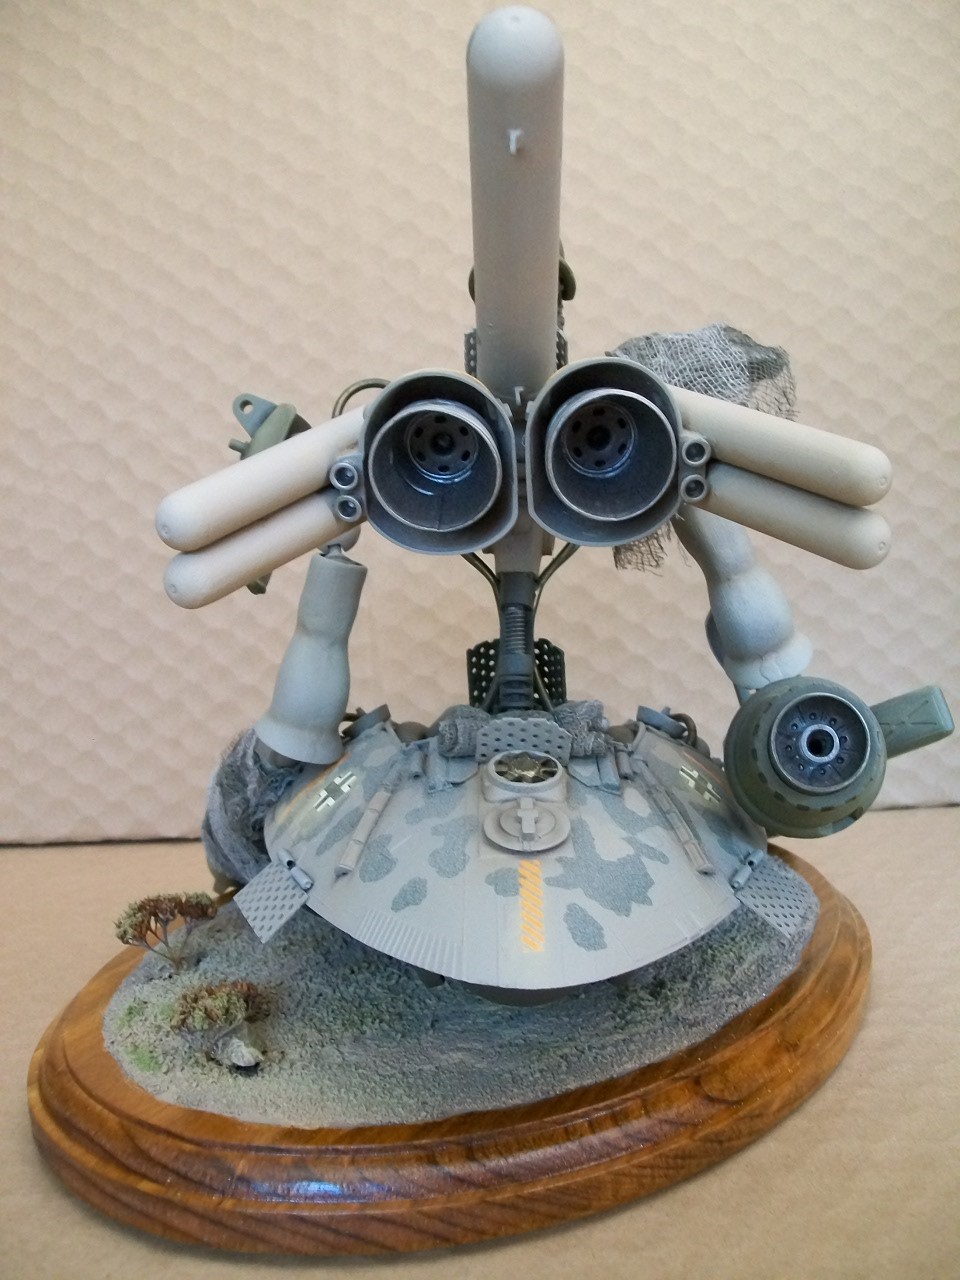
The model went through many changes over the weeks.  The original intent was for it to have that massive bulk of tanks under the saucer as in the concept sketches, but after the attempt it looked like crap, so I went more Gampf than Baund-Doc.  First it was going to be spacey, then ground based, then spacey again.  Eventually I settled on a ground based unit, and decided to make it part of the "North Africa: 2042" scenario I started way back in 2015.  As the Tortoise was a British unit, I made this a German machine.  But it is much larger, the Gottesanbeterin!


The model is built to 1/72 scale, and the design has strayed quite far from the original Kobayashi concepts.  It is more Dieselpunk now, and ready for some future desert combat!


The "Gottesanbeterin", or Preying Mantis, is a mech from the fictional "Neues Deutchland".  It skims above the ground (using rediscovered 20th century technology from the "Haunebu" projects), and it rips and tears at enemy armours with the heavy claws.  


With a crew of three, and only the one main gun, this unit relies on other smaller support mechs for defense.  (Not built for this diorama unfortunately, but maybe soon...).  


Painting was done using primarily Krylon Ultra Camouflage rattlers, which are becoming hard to find these days.  Two basic colours for the base coats and then mostly Tamiya acrylics for the accents.  


  As before, I wanted to keep the weathering to a minimum as I doubt this monstrosity would have been (will be?) made using iron and other metals.  I used pastels to accent and put a fine layer of dust on the model.  After a few salvaged decals from other German kits, I layered on some camo netting to help hide it from the other guys...  

So the title of this posting, (Flammkuchen Freitag!), is roughly translated to "Pizza Friday".  End of the week is usually rewarded with pizza, especially around here.  And even in North Africa 21 years from now, nothing has changed.  But how do three hungry fighting men in an armoured mech get pizza way out in the desert?  You have it delivered of course!


I had this 1/72 Kettentrad kit from Hasegawa around for quite some time, so I thought this would make a good delivery van.  Now it takes awhile to get pizza out there; no thirty minutes it's free.  But in the near future the pies are shipped in thermal stasis boxes; as fresh as the day they were made!


My wife told me today, "That is the weirdest model you have ever built..."  And I agree!  So much that I plan to do a proper Baund-Doc someday.  This time the spacey version sporting the tank farm underside.  Here are some more nice blue sky beauty shots:


So remember, there is always time for pizza.  And don't forget the pineapple!  Have a better one, readers!

Saturday, December 19, 2020

Simon Says...

 Stalenhag a snow globe!  As mentioned in the previous post, I had more ideas for this little diversion from the ongoing major build.  So I decided to pay homage (albeit only miniscule) to another of this 21st Century's great new artists!  

I first saw Simon Stalenhag's work somewhere on the internet about seven years ago.  This painting of an anti-grav ship docked over a frozen lake got me hooked at once!


The hyper realism and attention to detail made this appear as more of a photograph than a painting.  His bio and achievements are impressive.  I could go on for paragraphs about his work but I implore to visit his site: (http://www.simonstalenhag.se/), read a book or two of his art, listen to his music, and watch the "Tales from the Loop" series.  I just heard there is now a movie in the works...

So for this snow globe project,  I took inspiration from this painting:


Now the problem was scale.  I had to try to cram a lot of interest into a 4" diameter globe and still try to tell a story.  So I rummaged through the greeblies box for a while, and a few nights later cobbled this together.


Some sharp eyes out there may recognize the base sphere; it was a failed TIE Interceptor kit from way back in the '80s.  Never chuck anything out!  I added on tank parts and other bits and pieces, and then secured it to a molded foam base to simulate snow drifts.  Again as with the first globe, all paints and glues could not be water soluble.  

I painted and weathered the globe as per the above illustration (and some other similar paintings), painted the base white, and added evergreen trees around the sphere.  But as you can see, all the paintings have people for scale, so a couple of rogue N scale figures were drafted.


Now secured to the plug, I added the missing dinosaur.  You heard that right!  Another one of Simon's talents is his "Paleoart", as well as including them in the landscapes with other mechs or harassing delivery trucks!  His colour palette is unique as well.  Inspiration from a swallowtail caterpillar provided the semi camo pattern for the Velociraptor.  


And as said before, all in a little 2" diameter base...


So the lesson here is simple.  Before you and your mates go salvaging abandoned tech, be sure to check out the local wildlife first.  Or at least make sure you let the other guy go first...


Distilled water with some glycerin as a thickener filled the globe, and about two tablespoons of fine glitter to simulate snow.  It took a few attempts to find the right grade of glitter that would work (never thought I would be saying that...); too fine it stayed suspended and too coarse it just clumped.  It was the sand issue all over again.  The "lid" was sealed with some teflon tape and another lid added for the base which was painted red oxide.  


Again surprised at how much the model inside is magnified by the globe and water.  Now for a little shake...


I think the snow globe demon has been purged; I do not plan on making on more.  I'm sure those other acrylic spheres purchased in a buying frenzy can be put to some other use...


That about wraps it up for our pair of hapless scroungers, and the (very interesting to say the least) year of 2020.  And as the snow flies around the miniscule Stalenhag sphere (within a sphere!), we can almost hear our hero say, "Maybe I can loose that lizard in this blizzard..."

Merry Christmas and Happy New Year everyone!


Saturday, November 28, 2020

A Sandstorm in a Snow Globe (what...?)

 Still in the middle of a rather large build, I needed a break and wanted to work on something else.  Nothing too big and/or time consuming, and preferably a different subject matter.  It was during the weekly visit to the good ole dollar store (which are now frantically stocking every conceivable nook and cranny with Christmas merchandise), that I stumbled across a "DIY Snow Globe" kit, and that got the mind racing.  


It's a heavy duty plastic 4" diameter ball with a plug and screw on "cap".  Ship in a bottle came to mind but that has been done enough, so I began to think of something unique.  It's a snow globe, but does it have to be snow?  Going through many Anime books, I came across an illustration from the series "Dougram: Fang of the Sun".  I had found my inspiration!


I had seen this many years ago, in one of the many Dougram kits I have collected since the early '80s.  Funny thing was that I never saw an episode until a few years ago (RIP KissAnime), and was surprised that the first episode began with this image.  The series ran from 1981 to 1983 with a total of 75 episodes.  The mech designs are among my favourites, and were designed by Kunio Okawara, who also has done many other robot series such as the Gundam series, Votoms, and Layzner.  That CV barely scratches the surface!  Luckily I had a 1/144 scale Dougram kit from Nitto, but it didn't know what I was going to do it.


As usual this series was heavily merchandised, and many models and die-cast replicas were available.  Some may recognize this by it's American name as Zoltek.  Back in 84ish when robots were becoming quite popular in North America, Revell got the rights and repacked alot of the 1/48 and 1/72 Takara Dougram kits as Robotech Defenders, which was nice as they were cheaper than buying the genuine imports.  FASA also rebranded some 1/144 Nitto kits for their Battletech line, this time it was renamed Shadowhawk.  Even small, they were nicely detailed kits.


So I set about assembling the small parts not worrying about articulation as this was to be a static model.  And the one primary factor in all of this project was that nothing could be water-based.  Super glues, epoxy, and paint could only be enamels or lacquers.  


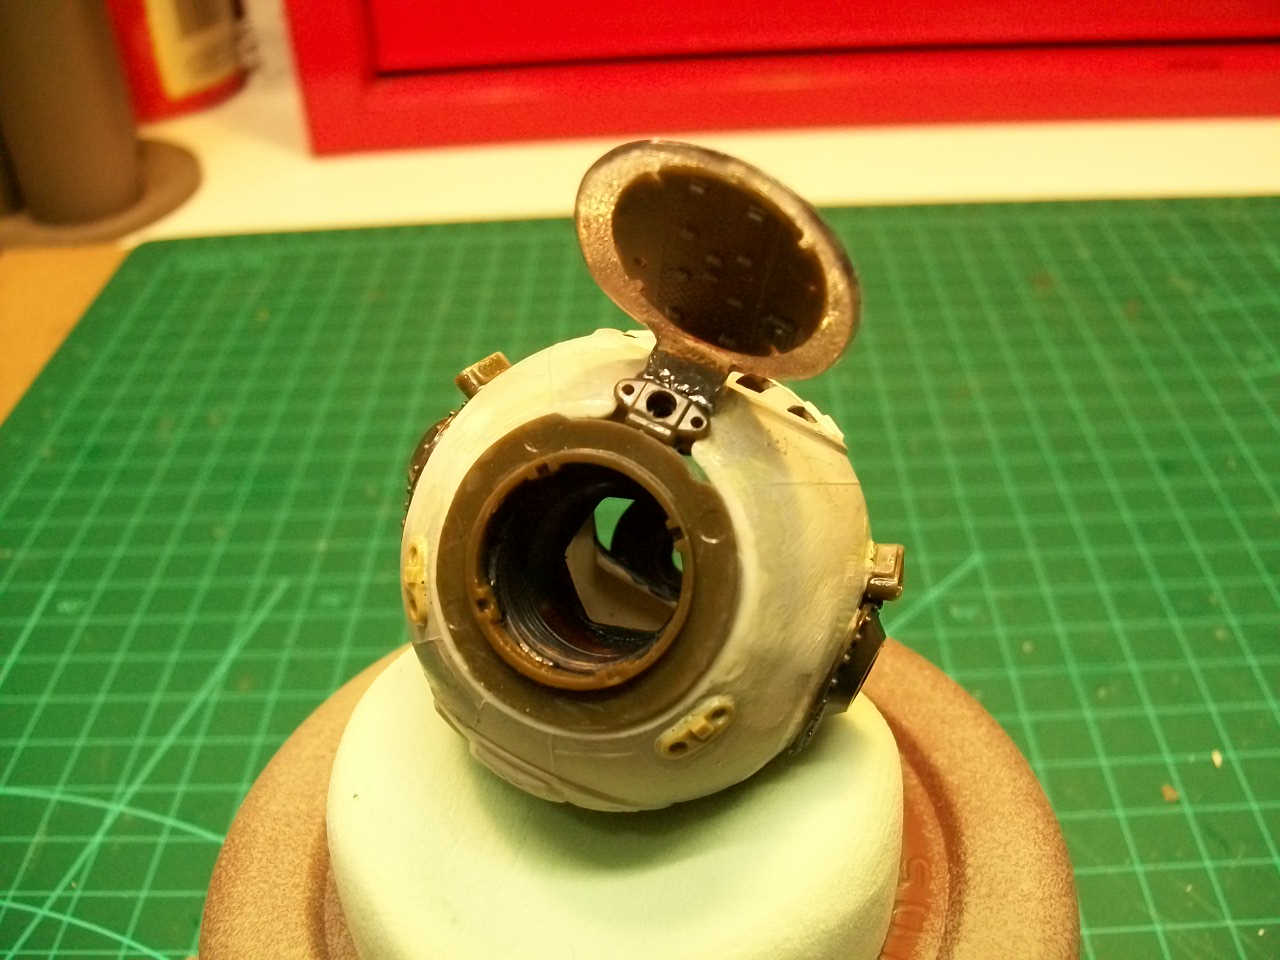
You get the idea how small this model will be.  The access hole in the globe is only 2.25" diameter, and should stick up somewhat from the plug.  Now trying to build a 3D model from a 2D illustration is not always easy, as I am sure the artist was obviously not aware of the limitations of the model.  It was like Sir Lancelot trying to do Yoga...  Pieces had to be removed and modified, and I had to have the mech sitting up a bit on a rock.  Eventually it all came together.


The green disc below is tooling foam, and was to carve in the rocks and terrain.  I also attacked the model with the Dremel and removed chunks and created gashes and battle damage.  It is now prime time!


Dry brushing was used to augment the rust and weathering on the mech.  I also mixed in some fine sand with the paint to create the texture.  Sand was also epoxied to the base and sand applied.  The base also got a good dose of dry brushing too.  Almost there...


It was now time to put it in the globe.  I read several ways to do the interior liquid, but that was only for snow.  Wanting to use real sand, and not some glitter or such, I tried several grades until I found one which wasn't too fine that it stayed suspended, or too coarse where it just drops.  The sand also had to be washed thoroughly as it had lots of dust and impurities in it.  Distilled water was used with a small amount of glycerin to hopefully slow down the grains.  It took seven attempts to get it right!


A wooden base a "plaque" finish the job.  To seal the threads I used plumber's teflon tape; so far no leaks!  


I was surprised to see how much the water filled globe magnified the model inside.  It amplifies it by almost double, and shows the extra work and detail.  


All in all about two weeks of evenings for this project.  Of course during the process many more ideas have come to mind.  Some more with sand and maybe even try a few with snow.  I have already been back to the shop and now have six more globes standing by...  But for now, a sand storm is approaching!  


Not exactly the winter wonderland for this time of year!  Merry Christmas everyone!

Saturday, September 5, 2020

Cheap as Chips Spray Booth

Well, that was summer...

While working on my current project (still many weeks away before completion), I realized I needed another method of spray painting.  The part(s) in front of the old hanging sheet was not working too well.  I had 42 parts to begin with, and lots more coming.  After the first session, the workroom was of course covered by a nice fine layer of white dust from the primer.  This could not go on.  I did not have the time or resources to construct a fully operational paint booth, so I came up with a very simple and inexpensive solution which took only one hour to build!


I have had several of these large boxes used for storage since I saved them from the cardboard bin way back in the 90's.  These heavy 2-ply corrugated cardboard boxes were originally packing cartons for those bloody great graphics monitors (17" screens) which could kill you or at least give you a hernia to remember.  The boxes are cubes of 24" each side.  Now that I had the housing, I needed the mechanical parts.

I went to the local hardware store where I bought a cheap 20" box fan for $30.00 (these are Canadian funds by the way), a pack of three 20" x 20" fiberglass furnace filters, which were about $6.00, and a role of duct tape.  I paid the lady with cash and got back some more cash with a Scotsman on it...

Returning home I folded the flaps of one end of the carton inwards, which strengthened the box and made a four ply base to attach the fan, which fit perfectly.  I used some tapping screws to anchor the unit in place and applied duct tape to seal the seams.


I then placed all three furnace filters on the inside and duct taped all gaps.  I left the front flaps loose so I could adjust them to suit the task.  Setting up on a work table, I plugged it in and got the paint flying.  Worked to perfection!  The fan at high speed created a nice air flow and the excess paint went no further than the filters.  I did find that on some of the heavier sessions the paint would accumulate restricting air flow.  But waiting a day I used the shop vac and removed alot of the excess dried paint.  No more fine dust everywhere!  It is fairly lightweight and portable, and can be set up in minutes.  I wish I had thought of this much sooner...  Time will tell how long before it will be necessary to change the filters. 

So try it yourself!  A "Cheap as Chips Spray Booth!". 


Sunday, June 7, 2020

Skiffs

Part 6 of the "Tofu Tower" series will showcase the last two ships, which are the smallest (2" long each), permanently fixed to the tower, and were the first and last models made.  Both have no names; only functions.  And taxed my eyesight in the process!

The first skiff built took about a week.  More time spent scrounging than assembling.  I just wanted a basic little ship to mingle with the larger boats, but the inclusion of the tower changed that.   Here are a couple of shots of the "naked" and the primed model:


With all the other boats circling the tower, I thought making this a taxi would be logical.  What better way for the crews to be shuttled back and forth?  Currently it is moored above the "Zevon" tank waiting for a fare.  


The second skiff, the final model to be built, was a last minute addition inspired by a documentary series.  The wife and I had started watching this BBC show about the brave volunteers of the RNLI (Royal National Lifeboat Institution), so I decided to model a little nod to these many men and woman doing an extraordinary job!  Check it out if you get the chance!

The hull of the "Class B Lifeboat" is just a landing craft from a 1/700 Airfix kit.  Again not many greeblies left to finish it.  Unfortunately no primer shots were taken.


Gary Putz has been a very naughty boy!  He was up on one of the mooring masts doing some repairs, but he was in such a hurry, he didn't secure his fall arrest PPE!  All his tools plummeted 300 feet to the ground, and luckily he managed to grab onto the chain swaying in the wind below.  Even luckier for him the tower has an RNLI station...


Not only is Gary's pride ruined, (and his coveralls slightly soiled...) he is going to have to buy several rounds at Taffey's tonight to thank the lads for saving his ass.  


Again the figures are N scale Graham Farish.  The crew were actually fireman, but I repainted them in RNLI kit.  Remember, safety first!

Now look up, wayayayay up!  


That wraps it up for the "Tofu Tower".  The Mark II version is already planned, but it is going to be 00 gauge (1/76) this time!  Another project is already on the bench, but likely months away.  A hint as to the subject matter, "We got a Season 2!"  (And it's got nothing to do with Ian McQue!).