This model/concept never had a direction. It just "became" as I progressed with ideas and influences from several sources. There were no preliminary sketches, just a vague design mostly based on the Ultra Probe from the "Dragon's Domain" episode in Yr 1. When it became the PHOENIX from "Doppelganger" I have no idea. Here is the original:
Typical 60's spacecraft design. Textures, boosters, and sensor equipment. Also carries another ship in the "boot", but that is for another post. I intended to use this colour scheme, as you can probably see from the shots of the "studio scale" model.
But you can't build anything without raw materials. Although this ship is loaded with greeblies, nurnies, 3D printed and laser cut parts, and of course treasures from the ever giving dollar store, it still needs a base. For that I turned to these three basic kits for most of the primary parts:
I'd had that Airfix Apollo 1/144 kit kicking around for 40+ years! Of course had to utilize the (original) Eagle 1 model; there were actually three used. None new, mostly second hand or previously built kits, but salvageable none the less. The last kit was an obscure Revell kit of two Laser Battle Stations from 1984. It was never re-released.
It made sense to use the Airfix Apollo kit as it was exploited so many other times by Sir Martin for his "1999" models, and by others from various Anderson series. A few examples are the space dock from "Breakaway", derelict ships in "Dragon's Domain", and used as parts for many Alpha buildings, the Mark IV Hawks, and so on and so on... Since my plan was to make this ship modular, it worked out nicely to use individual stages of the rocket.
Each module has a brass tube insert, and for final assembly the pieces are stacked horizontally in a logical and aesthetically pleasing order. (I have yet to mix the modules to make alternate versions of the ship, perhaps at a later date). Also easier to handle and work with smaller parts, and not wrestling with four feet of plastic! So we will (finally!) begin with Module A, Command and Control. And since Module B, The Hub, is physically connected, we'll break that one down too! It begins with a purpose built 3D printed part I adapted from one of the many 3D Eagle models available online.
Module B's base is more recent, the ESA Lab payload from the Revell 1/72 shuttle kit. The connection was almost too perfect, like it was meant to be. It was then many evenings of finding the parts, and applying them.
Lots of tank parts and some surplus laser cut stock. The airlock tubes are made from acrylic storage tubes with a screw on top. I just reversed the cap and put in a laser cut door. Those tanks are actually plastic baby bottles for baby showers, hexagonal shaped with added plastic pearls (see Shape Spotting #4). The "Nostromo" probes are just various guns from other armour kits.
The final piece of the The Hub was the main antennae. Cobbled together from whatever, but the main dish was from the original Slave One kit.
It was then prime time. Unfortunately I did not take any pictures of the early paintings. Remember I was building other modules alternately. It depended on my mood as to which one I worked on. But everything was primed at the same time. For the base colour I used Krylon white primer.
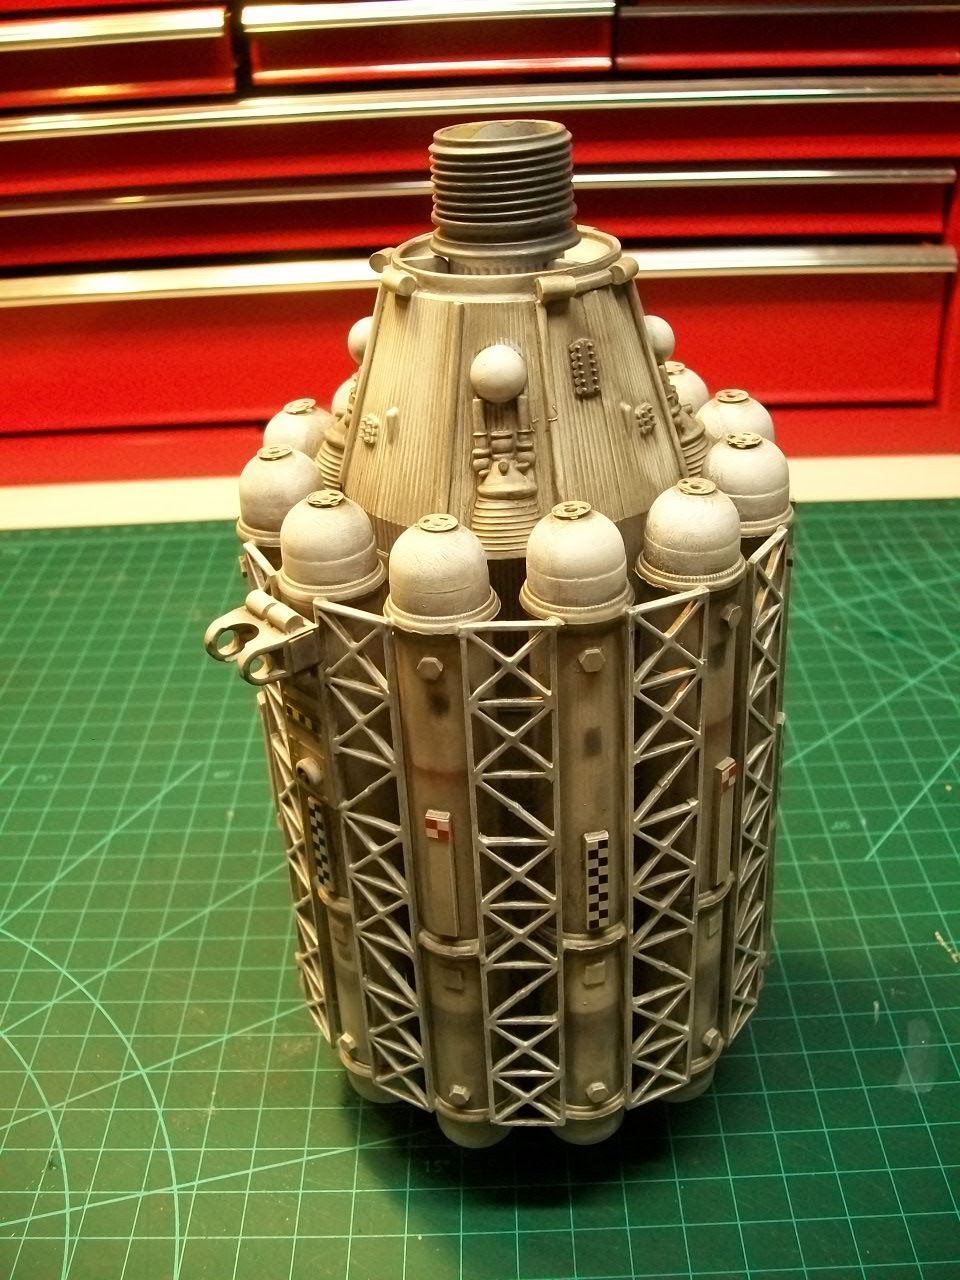
This is the finished Module A/B with accents, weathering/dirtying down, and graphics, with obvious nods to the original Phoenix scheme. It wasn't a model shop; it was an assembly line. The initial weathering was a failure. I had all parts ready to go and was going to use an acrylic wash of watered-down black, saturating with a sprayer and then removing paint accordingly. I had watched several You-Tube videos on this. But for some reason the paint did not like getting wet. It would not adhere and repel the wash, like water on a waxed car. Wasted a lot of black acrylic. Frustration set in so I abandoned the ship for a while and went on to another project. (See "Rusty Rails"...)

When I was ready to start up again I researched some other wash techniques and decided to try a 50/50 mix of IPA and acrylic black. I started by saturating the model with pure IPA and then spraying/brushing on the wash. The results were much better although it took many hours of fine tuning the wash. I strongly recommend doing this in a well ventilated room, outside or with an extractor fan, and with latex gloves. I also used pigments and pastels to better increase the detail definition.
Command module was painted yellow, and the airlock doors red. End of airlock tubes painted a medium grey. The graphics I created myself. Using AutoCAD of all things, I produced and series of checkerboard and hazard stripes, as well as various emblems and type. I printed on matte photo paper rather than decal paper; more durable and forgiving and there is no glossy finish. By mistake I printed one in BxW; used these more than the colour sheets!
The grapplers on the main airlock was a last minute concept. I had already built the grapplers for another part of the ship, and had some spares. Needed something for the ship to hang on with, as in docking with space stations or other ships.
To get the nice crisp border around the viewports, I used .02" x .02" strip styrene with an absolute minimum of glue. Those were the basic steps and procedures for the construction of the model. Next time we'll break down Module C - Primary Life Support, where I have exhausted my acrylic tube supply!